You have probably noticed that the sealant in your bathroom can start to become damaged and discoloured over time. The constant exposure to water and products you use can result in your bathroom sealant looking anything but clean.
But removing bathroom sealant isn’t as easy as it sounds. Many things can go wrong, including causing damage to your bathroom suite, walls, or tiles as you remove old bath sealant.
This guide shows you how to remove old bath sealant safely and efficiently to avoid damage to your bath, shower, sink and tiles too.
How To Remove Old Bathroom Sealant
When looking for the best way to remove bathroom silicone, you have a few different options.
- Stanley Knife
A Stanley knife is typically the go-to tool for many people when it comes to removing bathroom sealant. It is a highly effective way to remove bath sealant. However, it isn’t the safest method of removal. When using a Stanley knife, you risk cutting yourself or damaging the area or bathroom appliance you are trying to reseal.
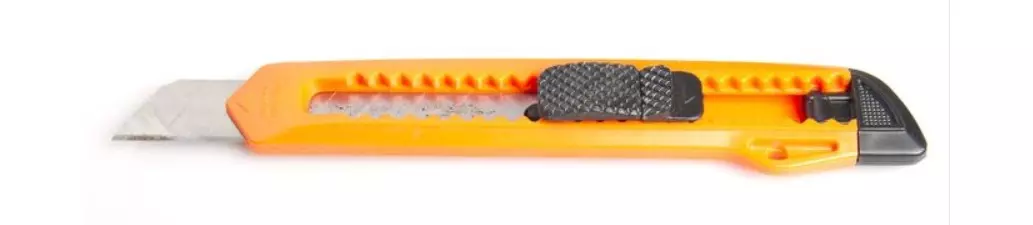
To remove bathroom sealant using a Stanley knife, you should;
- Cut along the length of the silicone. this will separate it from the wall
- Take hold of the loose edge and peel it away from the wall. Hopefully, this will result in your removing the silicone in a long strip.
- Next, you need to remove any leftover pieces.
Alternatively, you can use a bath sealant tool, a small tool designed for the safe and effective removal of bath sealant.
- Bath Sealant Remover Tool
A bath sealant remover tool is a similar size and shape to a Stanley knife except without the risk of using a sharp blade. Typically these tools can be picked up for less than £10 and can be used in the same way as a Stanley knife to scrape off old bathroom sealant ready to replace it. They can also be used after the application of a new sealant to smooth the sealant down.
- Removal Gel
If you want to know how to remove old bathroom sealant more easily, you can use a sealant remover gel. This takes away all of the hard work and scraping from the task. Sealant removal gel can be bought for less than £10. It is effortless to use. All you need to do is;
- Put the tube into a mastic gun. Then chop off the end of the tube using a knife or scissors.
- Using the mastic gun, squeeze the gel into the old sealant.
- Leave for around 2 hours at least. For best results, wait for at least 12 hours for easier removal, especially older and more damaged sealant.
If you have used a Stanley knife or a bath sealant removal tool and your sealant has come away quite easily, you can also use the gel to remove any stubborn bits that won’t come off to avoid having to scrape them off and cause damage.
Clearing The Area
If you find there are still bits of old bathroom sealant that won’t come away, you can use white spirit to help you remove the old bathroom sealant easily. dab a little bit onto a cloth and rub it over the leftover sealant until they dissolve. The alcohol in the white spirit removes the adhesive and makes the old sealant easy to remove. If required, use tweezers, a plier, or even an old toothbrush to clean the area ready for the new sealant application fully.
Next, use the white spirit to clean the surface and a mixture of bleach and water to help kill off any mould that may be lurking underneath. If you have used the sealant removal gel, make sure all traces are fully removed to avoid it. Removing the sealant, you will be applying.
It is important not to skip this step before applying new bathroom sealant as any old bits of sealant or dirt or debris can stop the adhesive properly applying to the walls allowing water to penetrate and cause problems, including mould growth.
Once this has been done, and the surface is full, you are ready to apply the new sealant.
Applying New Bathroom Sealant
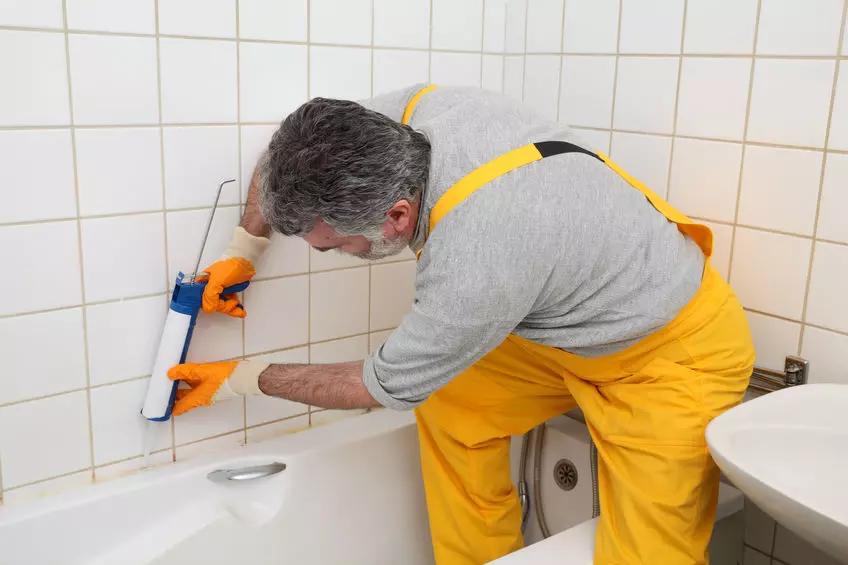
Applying the new sealant is pretty straightforward and similar regardless of the area you are applying the new bathroom sealant to. For this process, you can use either bath sealant tape or sealant via tube. Bath sealant tape is an easier, less messy application process but needs to be attached carefully to avoid any air bubbles and non-contact to the required surface. You need to apply the bath sealant tape as you would sellotape to the area and follow the instructions to make sure it is fully sealed and secure.
When using bathroom sealant, the process looks like this;
- Insert the sealant tube into the mastic gun
- Cut off the tip; the gap should be as wide as the gap between the appliance and the wall.
- Squeeze the silicone slowly into the gap.
- Wipe any excess as you go.
- Mix up a solution of water and wash up liquid. Using 50% ratio of each.
- Dip your finger into the solution to smooth out the new silicone and create a smooth, concave finish.
If you are worried about damaged or worn bathroom sealant, GT Sealants can assist you in replacing old and dirty sealant to revive your bathroom and make it look brand new.